画像のカスタムフィールドを作った際の備忘録
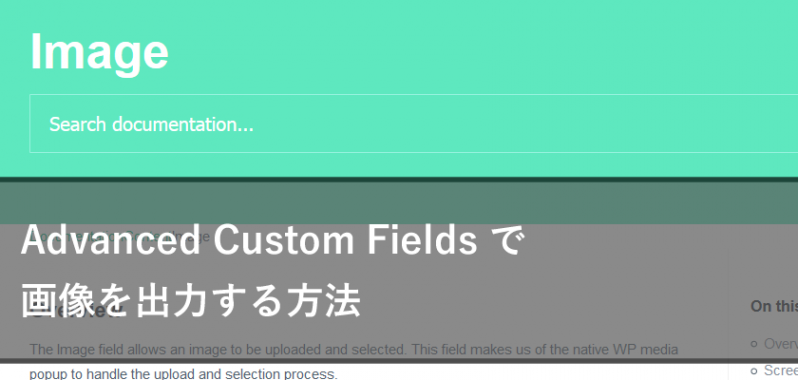
以前にWordPressのプラグイン「Advanced Custom Fields」を利用したカスタムフィールドの設定を紹介しましたが、画像の設定の際に色々な出力の方法があって悩んだので備忘録として残しておきたいと思います。
カスタムフィールドの設定自体は以前の記事を参考にしていただければ幸いです。
Advanced Custom Fieldsでカスタムフィールドを簡単に設定する
今回の記事の目的
- 画像のカスタムフィールドを設定する
- 出力の方法を考える
- 条件分岐で出力を制御する
今回は画像のフィールドの設定とその出力方法、さらにカスタムフィールドを利用しない場合には非表示にするような条件分岐も紹介しながら進めていきたいと思います。
画像の場合は「返り値」として画像そのものやURL、画像IDなど取得できる値がいくつかありますので、順番に見ていきましょう。
まずは基本設定から
以前の記事でも書いていますが、まずは基本的な設定から進めていきます。
カスタムフィールドメニューから今回は新規のグループで「画像の設定」を作っていくことにします。
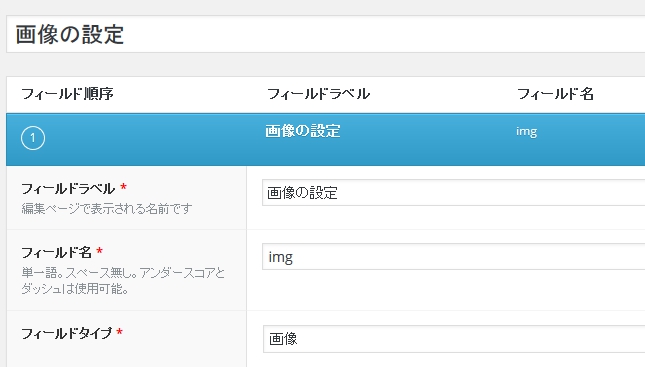
「フィールドラベル」には任意の名前、「フィールド名」にも出力の際に利用する任意の名前をつけ、今回は画像の設定ですので「フィールドタイプ」は「画像」を選択します。
ここまでの設定は基本的な使い方と同じなので、問題なく進められるかと思います。
次に画像特有の設定を見てきましょう。
返り値を設定する
返り値は以下の3つの設定から選択します。

- 画像オブジェクト
- 画像 URL
- 画像 ID
それぞれの設定でどんな情報が出力されるか見ていきます。
「フィールド名」を「img」とした場合
<?php the_field('img'); ?>
投稿画面で画像をアップロードしていくと、どんな情報が出力されるでしょうか。
以下のような画像をカスタムフィールドでアップする想定で考えてみます。
![]()
icon_isa_bass.jpg , サイズ: 180 × 180
- 画像オブジェクト
- 998, 代替テキスト, icon_isa_bass, キャプション, 説明文, image/jpeg, https://third-party.org/isalog/wp-content/uploads/2015/10/icon_isa_bass.jpg, 180, 180, Array
- 画像オブジェクトを設定した場合は、画像の情報を配列で全て返すようです。
そのため、キャプションや横幅など個別で出力したい場合に便利です。
※少々カスタマイズが複雑になることが難点でしょうか。 -
配列を書きだしてみてみましょう。
<?php
$image = get_field('img');
var_dump( $image );
?>
array(10) { ["id"]=> int(998) ["alt"]=> string(18) "代替テキスト" ["title"]=> string(13) "icon_isa_bass" ["caption"]=> string(18) "キャプション" ["description"]=> string(9) "説明文" ["mime_type"]=> string(10) "image/jpeg" ["url"]=> string(75) "https://third-party.org/isalog/wp-content/uploads/2015/10/icon_isa_bass.jpg" ["width"]=> int(180) ["height"]=> int(180) ["sizes"]=> array(18) { ["thumbnail"]=> string(83) "https://third-party.org/isalog/wp-content/uploads/2015/10/icon_isa_bass-150x150.jpg" ["thumbnail-width"]=> int(150) ["thumbnail-height"]=> int(150) ["medium"]=> string(75) "https://third-party.org/isalog/wp-content/uploads/2015/10/icon_isa_bass.jpg" ["medium-width"]=> int(180) ["medium-height"]=> int(180) ["large"]=> string(75) "https://third-party.org/isalog/wp-content/uploads/2015/10/icon_isa_bass.jpg" ["large-width"]=> int(180) ["large-height"]=> int(180) ["post-thumbnail"]=> string(75) "https://third-party.org/isalog/wp-content/uploads/2015/10/icon_isa_bass.jpg" ["post-thumbnail-width"]=> int(180) ["post-thumbnail-height"]=> int(180) ["small_thumbnail"]=> string(81) "https://third-party.org/isalog/wp-content/uploads/2015/10/icon_isa_bass-60x60.jpg" ["small_thumbnail-width"]=> int(60) ["small_thumbnail-height"]=> int(60) ["wp_rp_thumbnail"]=> string(83) "https://third-party.org/isalog/wp-content/uploads/2015/10/icon_isa_bass-150x150.jpg" ["wp_rp_thumbnail-width"]=> int(150) ["wp_rp_thumbnail-height"]=> int(150) } }このような情報が配列に入っているので、利用したい情報を活用するというイメージとなります。
- 画像 URL
- https://third-party.org/isalog/wp-content/uploads/2015/10/icon_isa_bass.jpg
- 画像URLはそのまま、画像のパスを返してくれます。
画像だけを素直に出力させたい場合は便利ですね。
アップした際の画像サイズがそのまま反映されるので、注意が必要です。 - 画像 ID
- 998
- こちらもそのままですが、画像のIDを出力します。
IDの場合サイズを指定することもできるので、サムネイルとライトボックスなどの大きいサイズ、複数の画像が必要な場合に活用できそうです。
出力の際の書き方
それぞれどんな値が返ってくるのかを確認したところで、今度はそれぞれの出力方法をみていきましょう。
公式の記述を引用する形で紹介していきます。
●画像オブジェクト
<?php
$image = get_field('img');
if( !empty($image) ):
	// vars
	$url = $image['url'];
	$title = $image['title'];
	$alt = $image['alt'];
	$caption = $image['caption'];
	// thumbnail
	$size = 'thumbnail';
	$thumb = $image['sizes'][ $size ];
	$width = $image['sizes'][ $size . '-width' ];
	$height = $image['sizes'][ $size . '-height' ];

	if( $caption ): ?>
		<div class="wp-caption">
	<?php endif; ?>
	<a href="<?php echo $url; ?>" title="<?php echo $title; ?>">
		<img src="<?php echo $thumb; ?>" alt="<?php echo $alt; ?>" width="<?php echo $width; ?>" height="<?php echo $height; ?>" />
	</a>
	<?php if( $caption ): ?>
		<p class="wp-caption-text"><?php echo $caption; ?></p>
		</div>
	<?php endif; ?>
<?php endif; ?>
画像オブジェクトは色々なカスタマイズが可能になりますが、上記の例の場合は以下のHTMLが出力されます。
<div class="wp-caption">
<a href="https://third-party.org/isalog/wp-content/uploads/2015/10/icon_isa_bass.jpg" title="icon_isa_bass"><img src="https://third-party.org/isalog/wp-content/uploads/2015/10/icon_isa_bass-150x150.jpg" alt="代替テキスト" width="150" height="150" /></a>
<p class="wp-caption-text">キャプション</p>
</div>
●画像 URL
<?php if( get_field('img') ): ?>
	<img src="<?php the_field('img'); ?>" />
<?php endif; ?>
上記の設定で以下のようなHTMLが出力されます。
![]() 画像URLを出力するだけの場合は、こちらの書き方がカンタンですね!
画像URLを出力するだけの場合は、こちらの書き方がカンタンですね!
<img src="https://third-party.org/isalog/wp-content/uploads/2015/10/icon_isa_bass.jpg" />
●画像 ID
<?php
$image = get_field('img');
$size = 'full'; // (thumbnail, medium, large, full or custom size)
if( $image ) {
	echo wp_get_attachment_image( $image, $size );
}
?>
上記の設定で以下のようなHTMLが出力されます。
画像IDを利用した場合、上記の場合はサイズの調整の他、画像IDに紐づいた「alt」などを付けることも可能です。
![]() 画像IDは自由度が高いのでカスタマイズ向きかもしれません。
画像IDは自由度が高いのでカスタマイズ向きかもしれません。
<img width="180" height="180" src="https://third-party.org/isalog/wp-content/uploads/2015/10/icon_isa_bass.jpg" class="attachment-full" alt="代替テキスト" />
引用:ACF | Image
表示・非表示の設定もしておこう
カスタムフィールドを利用しない場合に余計なタグが出力されてしまうことがありますので、あらかじめ条件分岐の設定をし、表示・非表示の設定をしておきましょう。
以下のような「if」を書いておくことで設定が可能です。
<?php if( get_field('img') ): ?>
//このエリアは画像をアップした時だけ表示されます。
<?php endif; ?>
「Advanced Custom Fields」などカスタムフィールドで出力する際には、あわせて条件分岐で出力の制御をしておくといいですね。
まとめ
いかがでしたか?
今回の記事では「Advanced Custom Fields」を利用した際の「画像の出力」について説明をしていきました。
カスタムフィールドを使って画像を表示させたい場合はぜひ参考にしてみてください。
公式サイトにも掲載がありますが、表示の方法も非常に簡単ですので、WordPressデフォルトの「アイキャッチ画像」や本文エリアでの画像のアップロード以外に、例えば「写真ギャラリー」や「物件情報」などあらかじめ決まった場所に画像を出力させたい場合に役に立ちそうです。
「Advanced Custom Fields」の出力についての備忘録は自分でも実際に悩んだ個所でもあります。
次は「チェックボックス」や「ラジオボタン」を利用した条件分岐なども紹介できればと思いますので、楽しみにしていてください!